Making my own stencils to create darling seasonal signs like this cutting board pumpkin is the best.

Creating customized decor for the home is awesome because it allows colors, ideas and messages to be added that fit the style and personality of those who live there. For me, I like things to be bright, cheerful and filled with possibility. This adorable cutting board sign made with a customized stencil is perfect for autumn and halloween!
Materials and Supplies Needed
- Unfinished Wood Cutting Board
- Unicorn Spit Stain (Red and Yellow OR Orange)
- Water
- Paper Towels
- Ikonart Custom Stencil Kit (Keep reading for LOTS of information and details.)
- Laser or Inkjet Printer
- Black Acrylic Paint
Directions
Start by staining the cutting board using Unicorn Spit Stain. I love this so much because it creates a beautiful finish that is perfect for adding painted words with the DIY stencil. Either mix red and yellow with water OR use orange stain. Paint the stain onto the wood. There really aren’t any steadfast rules for the ratio to mix when it comes to stain and water. It is totally up to you to practice and try different amounts and find what you love most.

Wipe with a dry paper towel immediately to get out any excess moisture and allow the grain of the wood to show through.

Getting Started with Ikonart Stencil Making
- Quick Start Guide
- Printed Inkjet Sample
- Finished Stencil Sample
- Inkjet Printer Film
- Laser Printer Film
- Ikonart Stencil Film + 2 Clear Exposure Sheets
- Exposure Stand + UV LED Light
- Ikonart Clipboard
- Ikonart Plastic Squeegee
- Coupon codes for free fonts and designs

Making the Stencil
Step One – Print Your Stencil
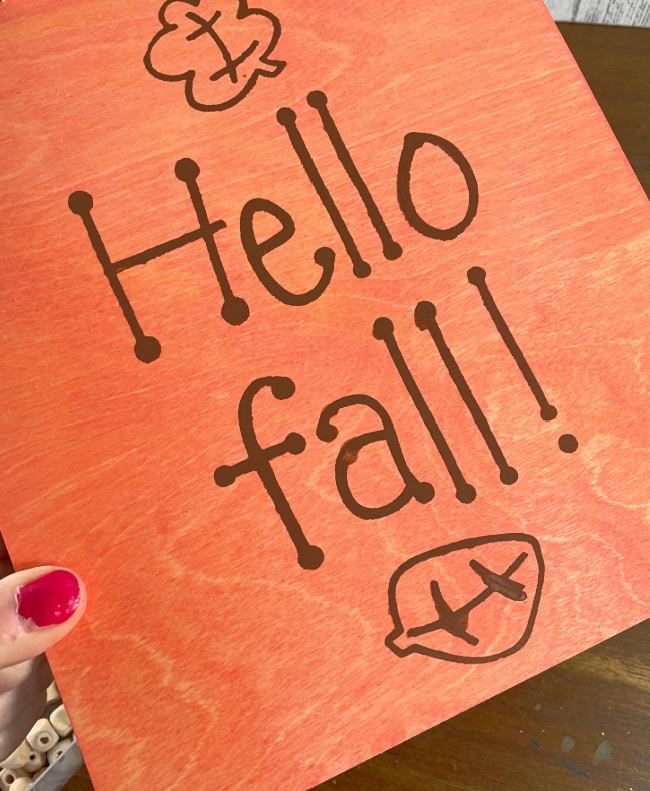
The very first thing to creating a custom stencil is to print (or doodle) your design. High quality printing in 100% black will give you the best film positive to block out the UV light. This really helps when it comes to washing out the stencil when it comes time. I actually used a font that I designed myself to create the image – along with my hand doodled leaves. I scanned it to create a free printable of the design in case you want to use it too! Print it on either laser or inkjet film – depending on what kind of printer you are using.
Step Two – Expose Your Stencil
The next step in making the ‘Hello Fall’ stencil is to expose it. Place the blue Ikonart Stencil Film on first – texture side up. Next place the printed transparency on top of the film so that what you see is what you want your stencil to look like. This would matter if you had words and didn’t want them to be backwards. The last piece in the pile is the clear exposure sheet. Rub over them all to make sure the stencil sheet is tight against the transparency. Turn on the exposure light for 35 seconds when using the laser film.

Step Three – Rinse Out Your Stencil
Clip your stencil on to the clipboard that came in the kit (shiny side down) and take it to the sink. Run hot to very warm water over it until the mesh part of your design is COMPLETELY clear.

Hang your stencil to dry. It will take about 45 minutes to an hour. Stencil must be dry before moving forward. It is okay to stick it to a glass door to hang for drying.

Step Four – Post Expose Stencil
The final step to finishing your stencil is to post-expose it. Place it back on the stand (texture side up) and turn the light on it for at least two minutes. This makes the stencil more durable so it will work better and be used over again.
Using the Stencil
Place the stencil on the sign and position it. If you are working on a slick surface, use washi tape to hold it in place. For this project, it stayed secure on its own. Place a small amount of paint on the stencil and use the squeegee to cover the open areas – being sure to go in one direction. This helps keep any paint from getting under the stencil.

Once the open areas on the stencil have all been covered with a thin layer of paint, peel the stencil off starting at one corner and lifting up and away. The stencil can be rinsed clean and reused once it has dried.
Once the paint is totally dry, add a bow from torn fabric, ribbons or twine to complete your fall decorative sign made on a cutting board.

MORE Fun Ways to Use DIY Stencils with Ikonart

Beth made a super elegant stencil and used it on a wooden tray. It came out gorgeous. All of the directions are over on Creatively Beth!

Sharing is Caring! Too busy to make this right away?! Pin it for later! Pin this project to your favorite craft board on Pinterest and it’ll be waiting for you when you’re ready.

I would really love to hear what you think about this stencil making idea! If you try it out, I would sure like to see it! Share on Instagram, Facebook, or leave a comment/photo on the project pin on Pinterest! #LauraKellyDesigns
This post contains affiliate links. If you make a purchase, it is no extra cost to you but supports me and my small business.
Cheers,
Laura