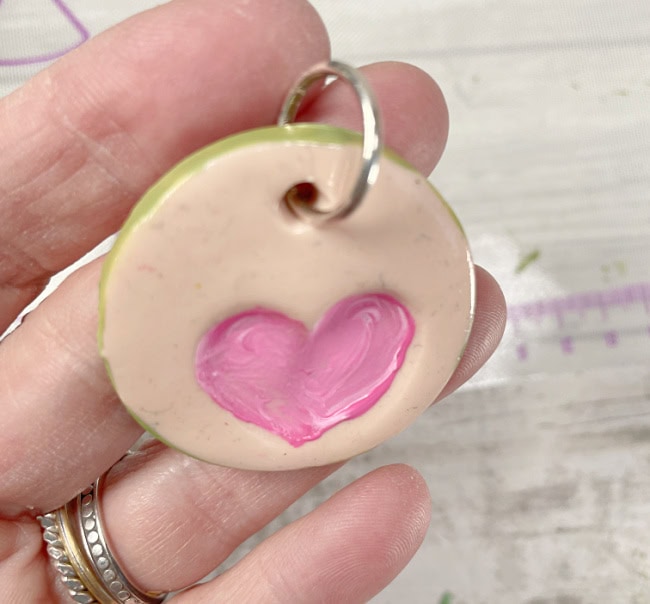
Are you looking for a simple gift idea for the kids to make for Mother’s Day? This DIY clay fingerprint keychain is fun to make and creates a personal and special gift.

This special token of love is completely personalized with the fingerprint indendations into the soft clay that make the heart. Once baked and painted, it is the perfect little gift to give to somebody you love. This craft project is especially perfect for kids to make as gifts for Mother’s Day moms and Father’s Day dads.
Materials and Supplies Needed
- Sculpey III Clay
- Rolling Tool and Pointed Tool To Make Hole
- Silicone Mat
- Round Cutter (1 1/2 inch or 2 inch Circle)
- Cookie Sheet and Oven For Baking
- Acrylic Paint
- Paint Brush
- Top Coat (Clear Acrylic Glaze)
- Key Ring Findings
- Permanent Marker

Directions to Make DIY Clay Heart Fingerprint Keychain
Start by getting your work area set up. Make sure your hands are clean. Once the clay is out of the package and being handled – any dirt or debris on your hands will be in the clay. You will need 1/4 of a 2 ounce package for each keychain.

Step One
Soften the clay in your hand then roll into a ball and use the rolling tool to flatten the clay. It should be about 1/5 inch in diameter or so. It can be thicker but note that the jump ring will need to be large enough to fit nicely in the depth of the hole through the charm once baked.
Step Two
Use the round cutter to create a circle. Once it is cut out, smooth the edge with your fingers if desired.

Step Three
Firmly press a finger down into the clay circle to make one side of a heart. Do it again to make the other side. This should be done towards the bottom of the circle leaving room at the top for the hole.

Step Four
Create a hole through the circle at the top, leaving at least 1/5 inch space from the edge.
Step Five
Bake in the oven on the silicone mat at 275 degrees for 15 minutes. Once out of the oven, let cool completely.

Step Six
Paint the heart using acrylic paints. For this keychain, pink is the color of choice.

Paint the sides and back if desired too. I used a pretty green. Once all of the paint is dry, put a topcoat over the entire piece and let it dry.

Step Seven
Add the keychain findings. There are loads of different ones to choose from out there. I like a big jump ring through the hole then a keyring on it.

Adding a lobster claw hook is such a special extra touch making it easy to attach the keychain to anything.

Add a special note on the back with a permanent marker!
About Sculpey III Clay
I love Sculpey III clay! It is so much fun to create with. Here are some of the features that make is so easy to work with in creating fabulous works of art.
- Great for beginners, general crafters and kid/parent projects due to its soft, easy to use texture.
- Stays soft until baked – Does not air dry. Remains soft and flexible until it is baked in your home oven.
- Extra clay can be stored and reused – won’t dry out!
- Great for a variety of projects such as: jewelry, DIY home décor, mixed media and more!
- Safe and non-toxic!
Sharing is Caring!
Too busy to make this right away?! Pin it for later! Pin this project to your favorite craft board on Pinterest and it’ll be waiting for you when you’re ready.

I would really love to hear what you think about this simple clay project! If you try it out, I would sure like to see it! Share on Instagram, Facebook, or leave a comment/photo on the project pin on Pinterest! #LauraKellyDesigns
This post contains affiliate links. If you make a purchase, it is no extra cost to you but supports me and my small business.
XO,
Laura

I love this. This clay sounds great too, I like the idea that it doesn’t dry out. It seems like such a waste if leftover clay gets wasted.