Everything you need to know to make clay wind chimes in any shape.

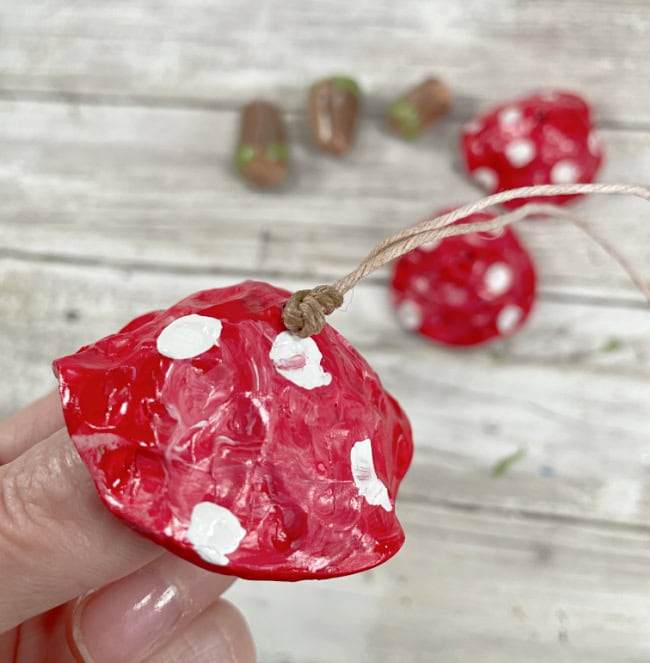
I love mushrooms so decided to make my first DIY wind chime by molding the pieces of them out of Original Sculpey clay. I love working with clay because it offers endless opportunity for creativity and customized pieces. The white Original Sculpey is perfect for this project because it is soft and easy to mold then once baked and cooled – easy to paint.
BUT FIRST…
Here are adorable mushroom printables that you might love too.

Materials and Supplies Needed
- Original Sculpey (White)
- Round Cutter (1 1/2 – 2 inch)
- Clay Tools – Round End Tool and Rolling Pin
- Wool Balls Or Large Marbles (1 inch Diameter)
- Silicone Mat
- Baking Sheet Oven
- Acrylic Paint
- Paint Brushes
- Hemp Cord/Twine

Directions
This project is best done in steps. There is a baking and cooling period between the molding and the painting so can be done in two separate sittings for the creating of the pieces. The third sitting is when the wind chime can be built and put together.
Step One
Use about 1/4 pound of the white Original Sculpey clay. Roll it in your warm hands to soften then use the rolling pin to flatten it. It should be about 1/4 inch thick (or even a little bit less).

Cut out three circles.

Use the round end of the clay tool to put little grooves all over the surface.

Place the circle piece over a wool ball or a large marble to shape the top of the mushroom.

Poke a hole through the center and place back over the ball. Leave the ball during baking.

Use the remaining clay to make three stems. The tool with the long point is now used to make holes through the center of all of the stems.

Bake at 275 degrees for 15-18 minutes depending on thickness. Check the packaging for exact baking directions.
Step Two
Once the pieces are out of the oven and completely cooled, they can be painted. Acrylic paint is perfect for this project. There are tons of colors out there so the possibilities are endless.

Use acrylic paints to add details and colors of your liking.

Let the paint dry then add a top coat/glaze. Let it dry completely before assembling wind chime.

Step Three
For the final step, put your wind chime together.
Start by cutting a long piece of twine (4 feet at least). Loop it and tie a knot, leaving about three inches for hanging.

Feed the ends of the two pieces opposite the loop through the mushroom pieces, tying knots along the way in the places where you want the pieces to be positioned.

Knots can be placed in between the tops and bottoms too.

Once all of the pieces are tied to the hanger. Trim the bottom off of that last knot. Hang your wind chime somewhere where it will not be exposed directly to the weather.
About Original Sculpey Clay
This clays is perfect for so many different types of projects. You can make original art projects at home and at school with this soft, pliable clay. It works and feels a lot like ceramic clay, with the benefit of not drying out when exposed to air. Did you know that after baking, it can be sanded, drilled, carved and painted with water-based acrylic paints or glaze?
More Mushroom Project Ideas
Make clay mushroom and create a fairy garden in an old bucket! Grab the deets.

If you love mushrooms, you might also like this fun FELT mushroom from Creatively Beth!

Sharing is Caring!
Too busy to make this right away?! Pin it for later! Pin this project to your favorite craft board on Pinterest and it’ll be waiting for you when you’re ready.

I would really love to hear what you think about this clay wind chime! If you try it out, I would sure like to see it! Share on Instagram, Facebook, or leave a comment/photo on the project pin on Pinterest! #LauraKellyDesigns
This post contains affiliate links. If you make a purchase, it is no extra cost to you but supports me and my small business.
XO,
Laura

Genius and so pretty. Love the sound of wind chimes.
Visited you via Love Your Creativity Link Party #197
If interested, please hop over and come and share your posts with us at Senior Salon Pit Stop. See my entries: 114-115, and navigate to the bottom of my page for SSPS linkup, we hope to virtually meet you there.
Awh! These are super cute, what a lovely idea for this kind of clay.
These turned out super cute. I need to make some for my front porch now.
I love anything for the garden and these adorable mushrooms would be lovely in any garden.
Happy spring,
Kippi
Now I really need to get my hands on some clay, because your mushroom windchime is darling! Looks like a cool rain chain as well! Adorable!
What an adorable clay project!
Thank you for sharing your DIY clay wind chimes project at Create, Bake, Grow & Gather this week. I’m delighted to be featuring this post at tonight’s party and pinning too.
Hugs,
Kerryanne